通过Plesk批量添加域名CNAME到CloudFlare

众所周知CloudFlare已经取消了通过CNAME接入域名。Plesk也取消了接入接口,我们可以通过控制台大法通过CNAME接入CF。

准备内容:

Plesk虚拟主机
域名
CF账户
大脑

1.Plesk已经将ServerShield隐藏起来了,但是没有删掉这个页面。可以通过域名的方式访问,这里用ION免费Plesk主机举例。

1
https://wp01.krypt.com:8443/modules/servershield/index.php/index/index?simple=1

粗体部分不变,替换主机域名即可。

2.F12-网络/network,进入控制台,点击域名开关。可能显示红色报错,但是有几率成功加入。但是我们还要加别的域名,一个个的换太麻烦了。

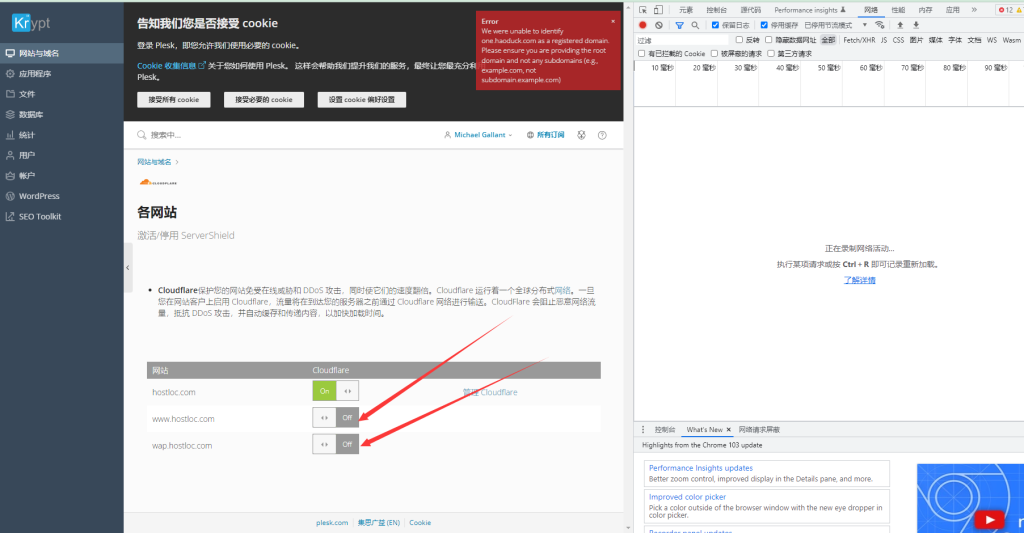
3.点完开关之后会显示报错,并且控制台中会显示servershield.php开头的文件。右键,复制fetch
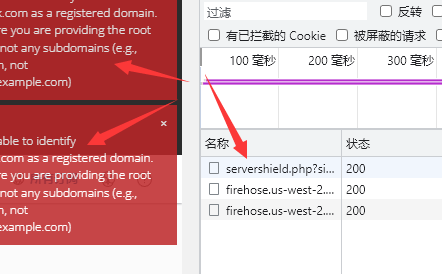
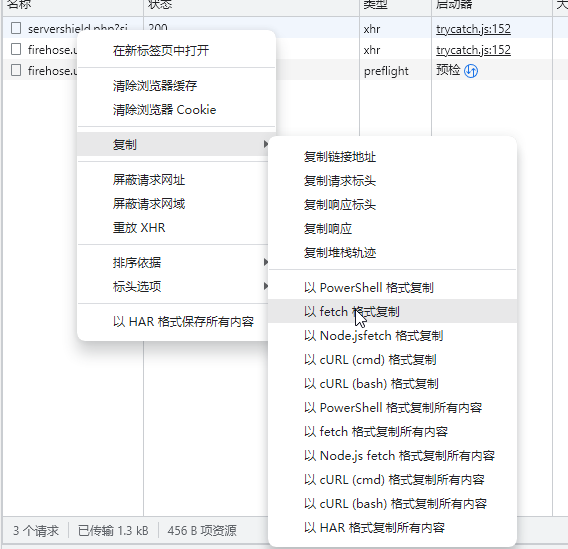
4.将会得到类似下面这样的代码

1
2
3
4
5
6
7
8
9
10
11
12
13
14
15
16
17
18
19
20
21
22
fetch("https://wp01.krypt.com:8443/modules/servershield/servershield.php?simple=1", {
"headers": {
"accept": "text/javascript, text/html, application/xml, text/xml, /",
"accept-language": "zh-CN,zh;q=0.9,ja-JP;q=0.8,ja;q=0.7,en-US;q=0.6,en;q=0.5",
"content-type": "application/x-www-form-urlencoded; charset=UTF-8",
"sec-ch-ua": "\".Not/A)Brand\";v=\"99\", \"Google Chrome\";v=\"103\", \"Chromium\";v=\"103\"",
"sec-ch-ua-mobile": "?0",
"sec-ch-ua-platform": "\"Windows\"",
"sec-fetch-dest": "empty",
"sec-fetch-mode": "cors",
"sec-fetch-site": "same-origin",
"x-forgery-protection-token": "fc9197b94c31a88ed123e74c40cf4123",
"x-prototype-version": "1.7.3",
"x-requested-with": "XMLHttpRequest"
},
"referrer": "https://wp01.krypt.com:8443/modules/servershield/index.php/index/index?simple=1",
"referrerPolicy": "strict-origin-when-cross-origin",
"body": "plesk_id=114&zone_name="hostloc.com"&act=zone_set",
"method": "POST",
"mode": "cors",
"credentials": "include"
});

倒数第5行中间的hostloc.com修改为

1
"+domain+"

然后用参数function add(domain)将完整的参数包裹起来。(别忘了括号{}

最终的结果:

1
2
3
4
5
6
7
8
9
10
11
12
13
14
15
16
17
18
19
20
21
22
23
function add(domain)
{fetch("https://wp01.krypt.com:8443/modules/servershield/servershield.php?simple=1", {
"headers": {
"accept": "text/javascript, text/html, application/xml, text/xml, /",
"accept-language": "zh-CN,zh;q=0.9,ja-JP;q=0.8,ja;q=0.7,en-US;q=0.6,en;q=0.5",
"content-type": "application/x-www-form-urlencoded; charset=UTF-8",
"sec-ch-ua": "\".Not/A)Brand\";v=\"99\", \"Google Chrome\";v=\"103\", \"Chromium\";v=\"103\"",
"sec-ch-ua-mobile": "?0",
"sec-ch-ua-platform": "\"Windows\"",
"sec-fetch-dest": "empty",
"sec-fetch-mode": "cors",
"sec-fetch-site": "same-origin",
"x-forgery-protection-token": "fc9197b94c31a88ed123e74c40cf4123",
"x-prototype-version": "1.7.3",
"x-requested-with": "XMLHttpRequest"
},
"referrer": "https://wp01.krypt.com:8443/modules/servershield/index.php/index/index?simple=1",
"referrerPolicy": "strict-origin-when-cross-origin",
"body": "plesk_id=114&zone_name="+domain+"&act=zone_set",
"method": "POST",
"mode": "cors",
"credentials": "include"
});}

5.然后,F12切换到控制台,粘贴function add这一段代码,回车

之后要添加别的域名,比如baidu.com

1
add('baidu.com');

你也可以选择批量添加:

1
2
3
add('qq.com');
add('baidu.com');
add('google.com');

偶尔会出现500错误,多试几次就行了。

基本上Plesk虚机都是支持的。

之后用CNAME接入,方法很多,这里不再赘述。